

Rollout Groups
Rollout Groups let you introduce members of one group into another in controlled stages, rather than moving everyone at once. This is useful when rolling out new access policies, migrating between security groups, or gradually transitioning users to a new configuration.
Rollout Groups is currently a beta feature.
When to Use Rollout Groups
- Migrating users from a legacy security group to a new one without disrupting access all at once
- Gradually rolling out a new policy or application license to batches of users
- Testing changes with a small group before extending to the entire organization
- Any scenario where a staged, controlled approach to group membership changes is preferred
How a Rollout Works
A rollout only ever adds users to the target group. It never removes anyone from the source group or from the target group. If you want people out of the old group afterwards, that's a separate step.
The candidates are the users who are in the source group but not yet in the target group. When you save the plan, Adcyma splits those candidates into stages and fixes the stage lists at that moment. That has two consequences:
- Someone added to the source group after you saved isn't part of the rollout. Create a new plan for them, or add them by hand.
- Someone removed from the source group after you saved is still added to the target when their stage runs.
Setting Up a Rollout
Click New (or Create New Rollout Plan if you have none yet).
Name and Description
Give your rollout plan a clear name so it's easy to identify in the plans list. The description field is optional but useful for explaining the purpose of the migration.
Source and Target Groups
Select the Source Group (the group containing the users to roll out) and the Target Group (the destination group receiving users in stages). Source and target can't be the same group. If you need a new target, click Create in the picker to make a new Entra Security Group straight away.
Target groups that are mastered in on-premises Active Directory work too. Adcyma sends those membership changes through the AD agent, so they show up after the agent has processed them and the next sync has run.
Schedule and Stages
Number of Stages How many batches the candidates are divided into. Each stage gets an equal share, give or take one user. If you have more stages than candidates, the later stages will be empty and the preview shows a Some stages empty badge.
Transition Type A switch between Scheduled Rollout (the default) and Manual Rollout. See Running the stages.
The next two settings only apply to scheduled rollouts and are hidden in manual mode.
Start At The date and time the first stage runs, in your browser's time zone. If you pick a time in the past, the rollout starts straight away.
Rollout Duration The time from the first stage to the last, in Hours or Days. Stages are spread evenly across it: the time between stages is the duration divided by (number of stages − 1). With a single stage, the duration isn't used.
An example: Start At Monday 08:00, duration 4 days, 5 stages. Stages run Monday, Tuesday, Wednesday, Thursday and Friday at 08:00, one day apart.
Preview
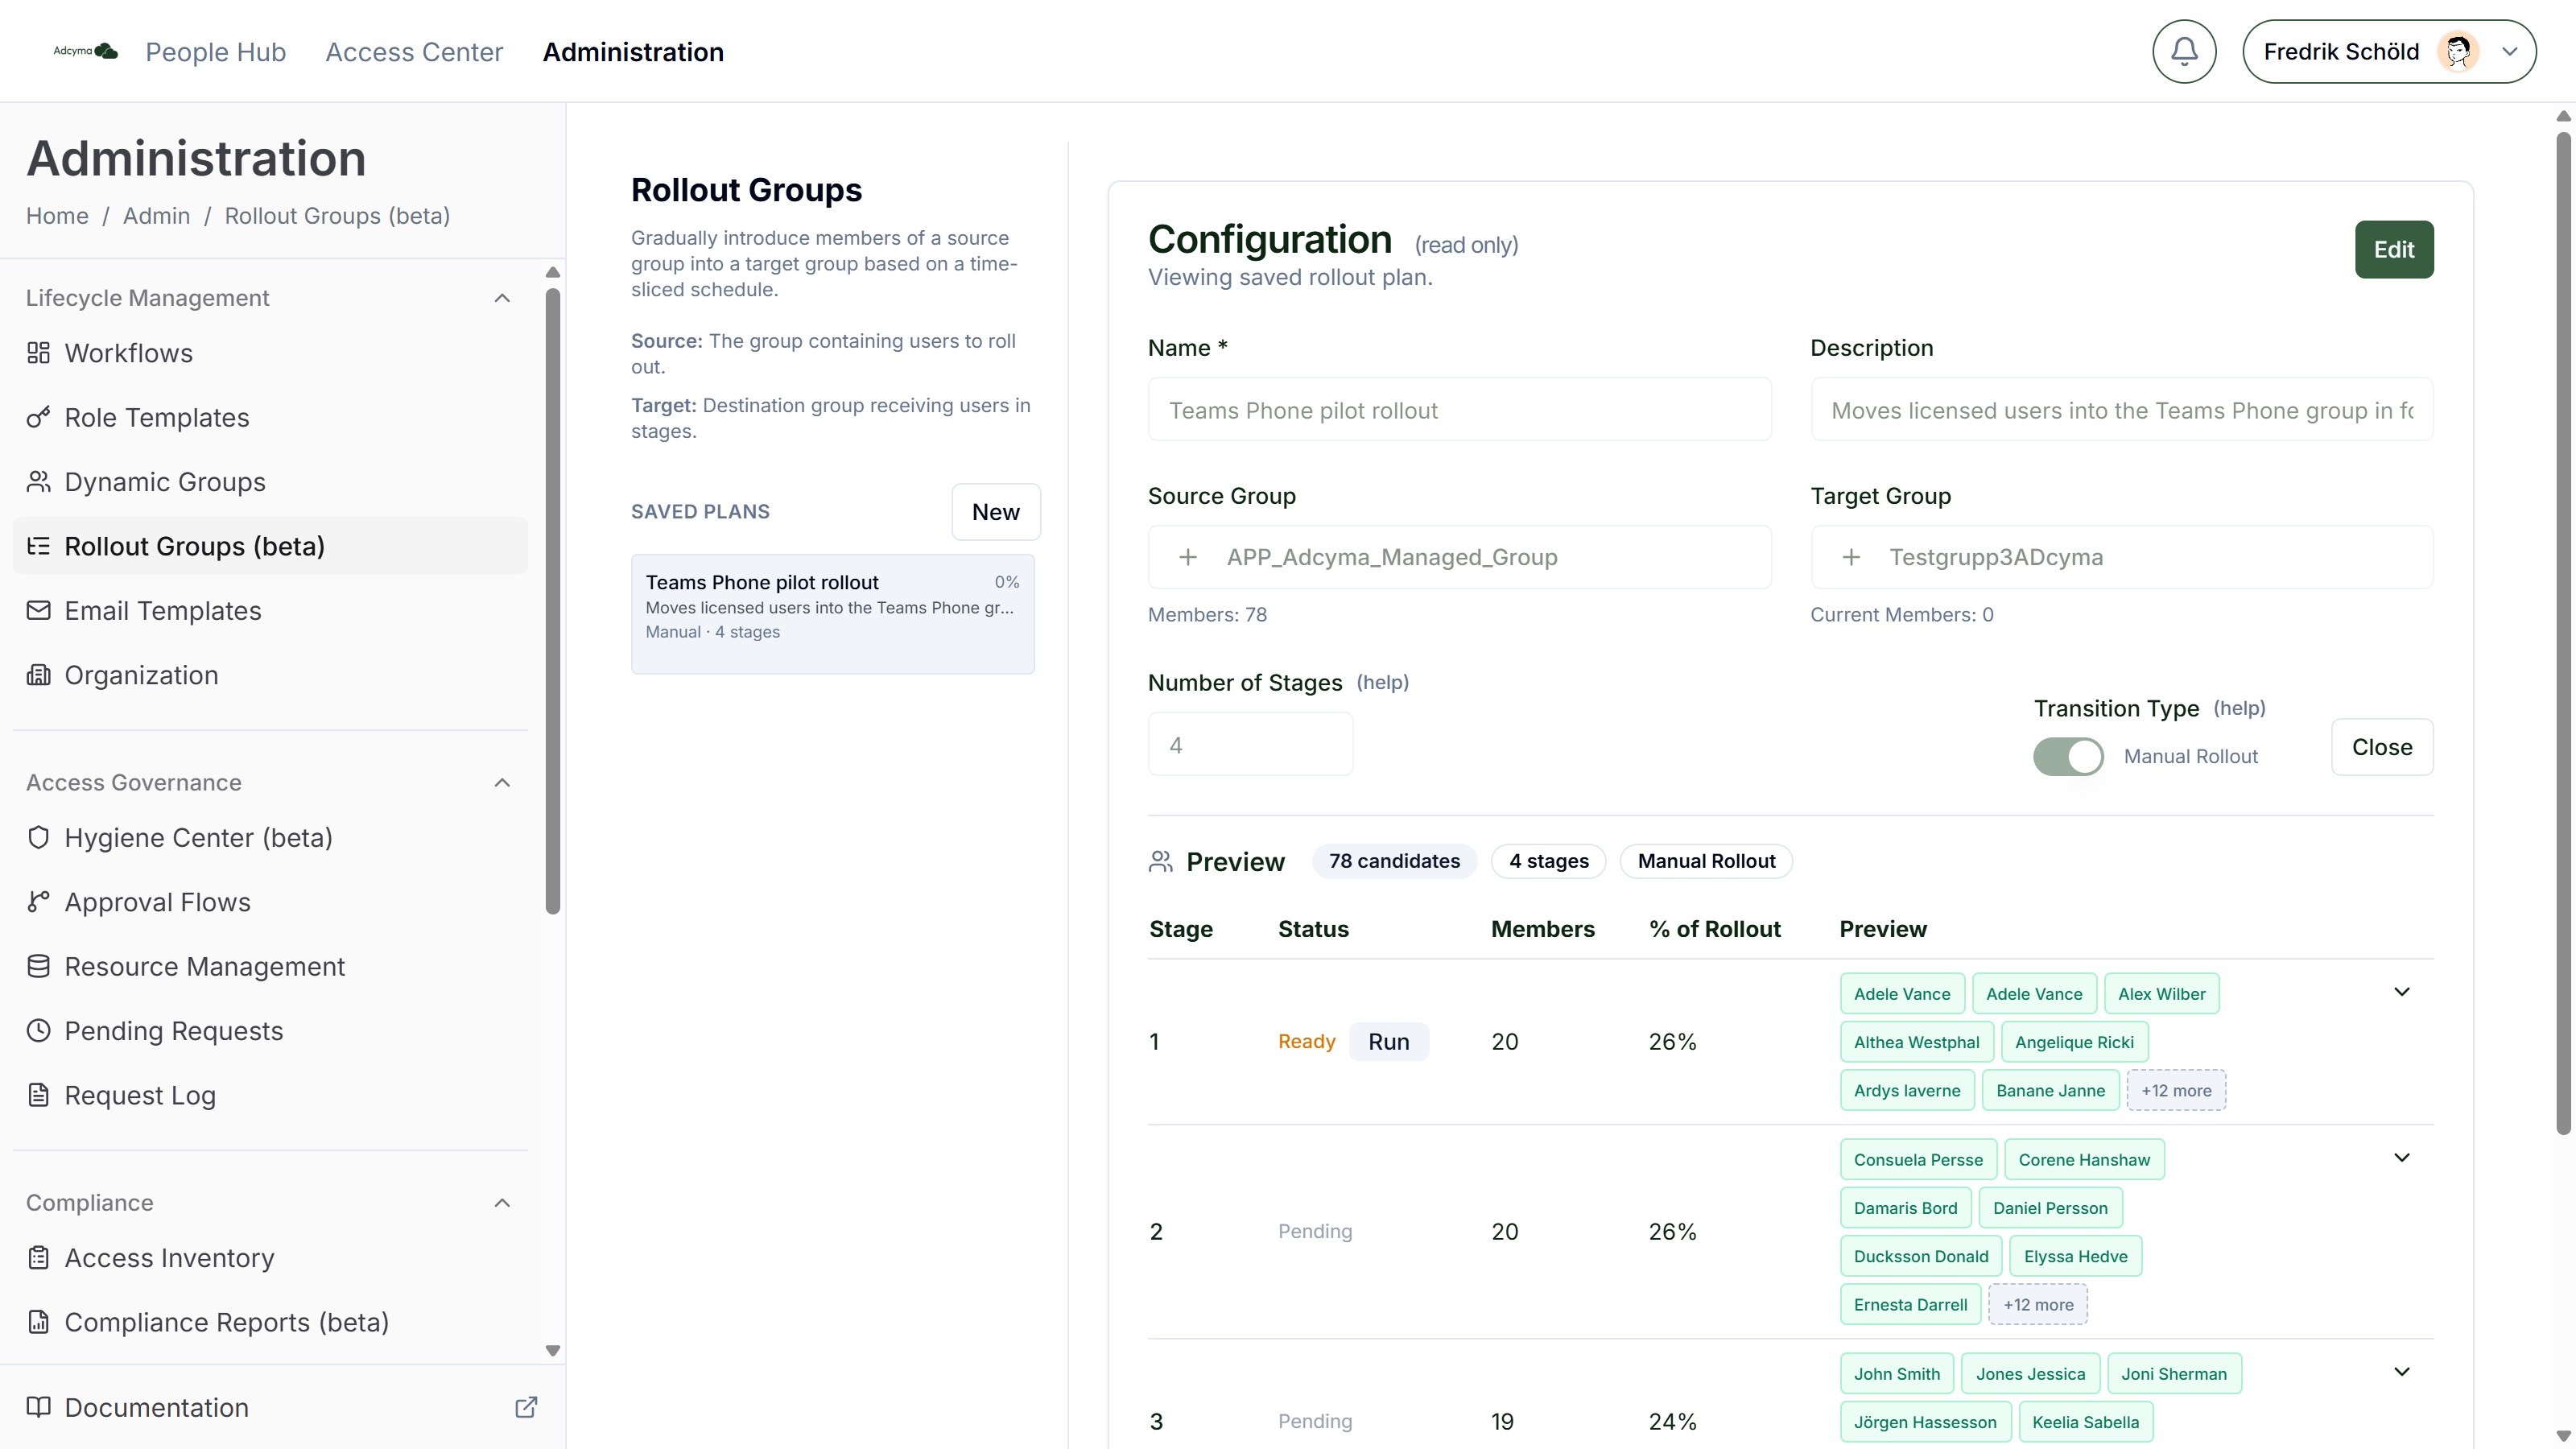
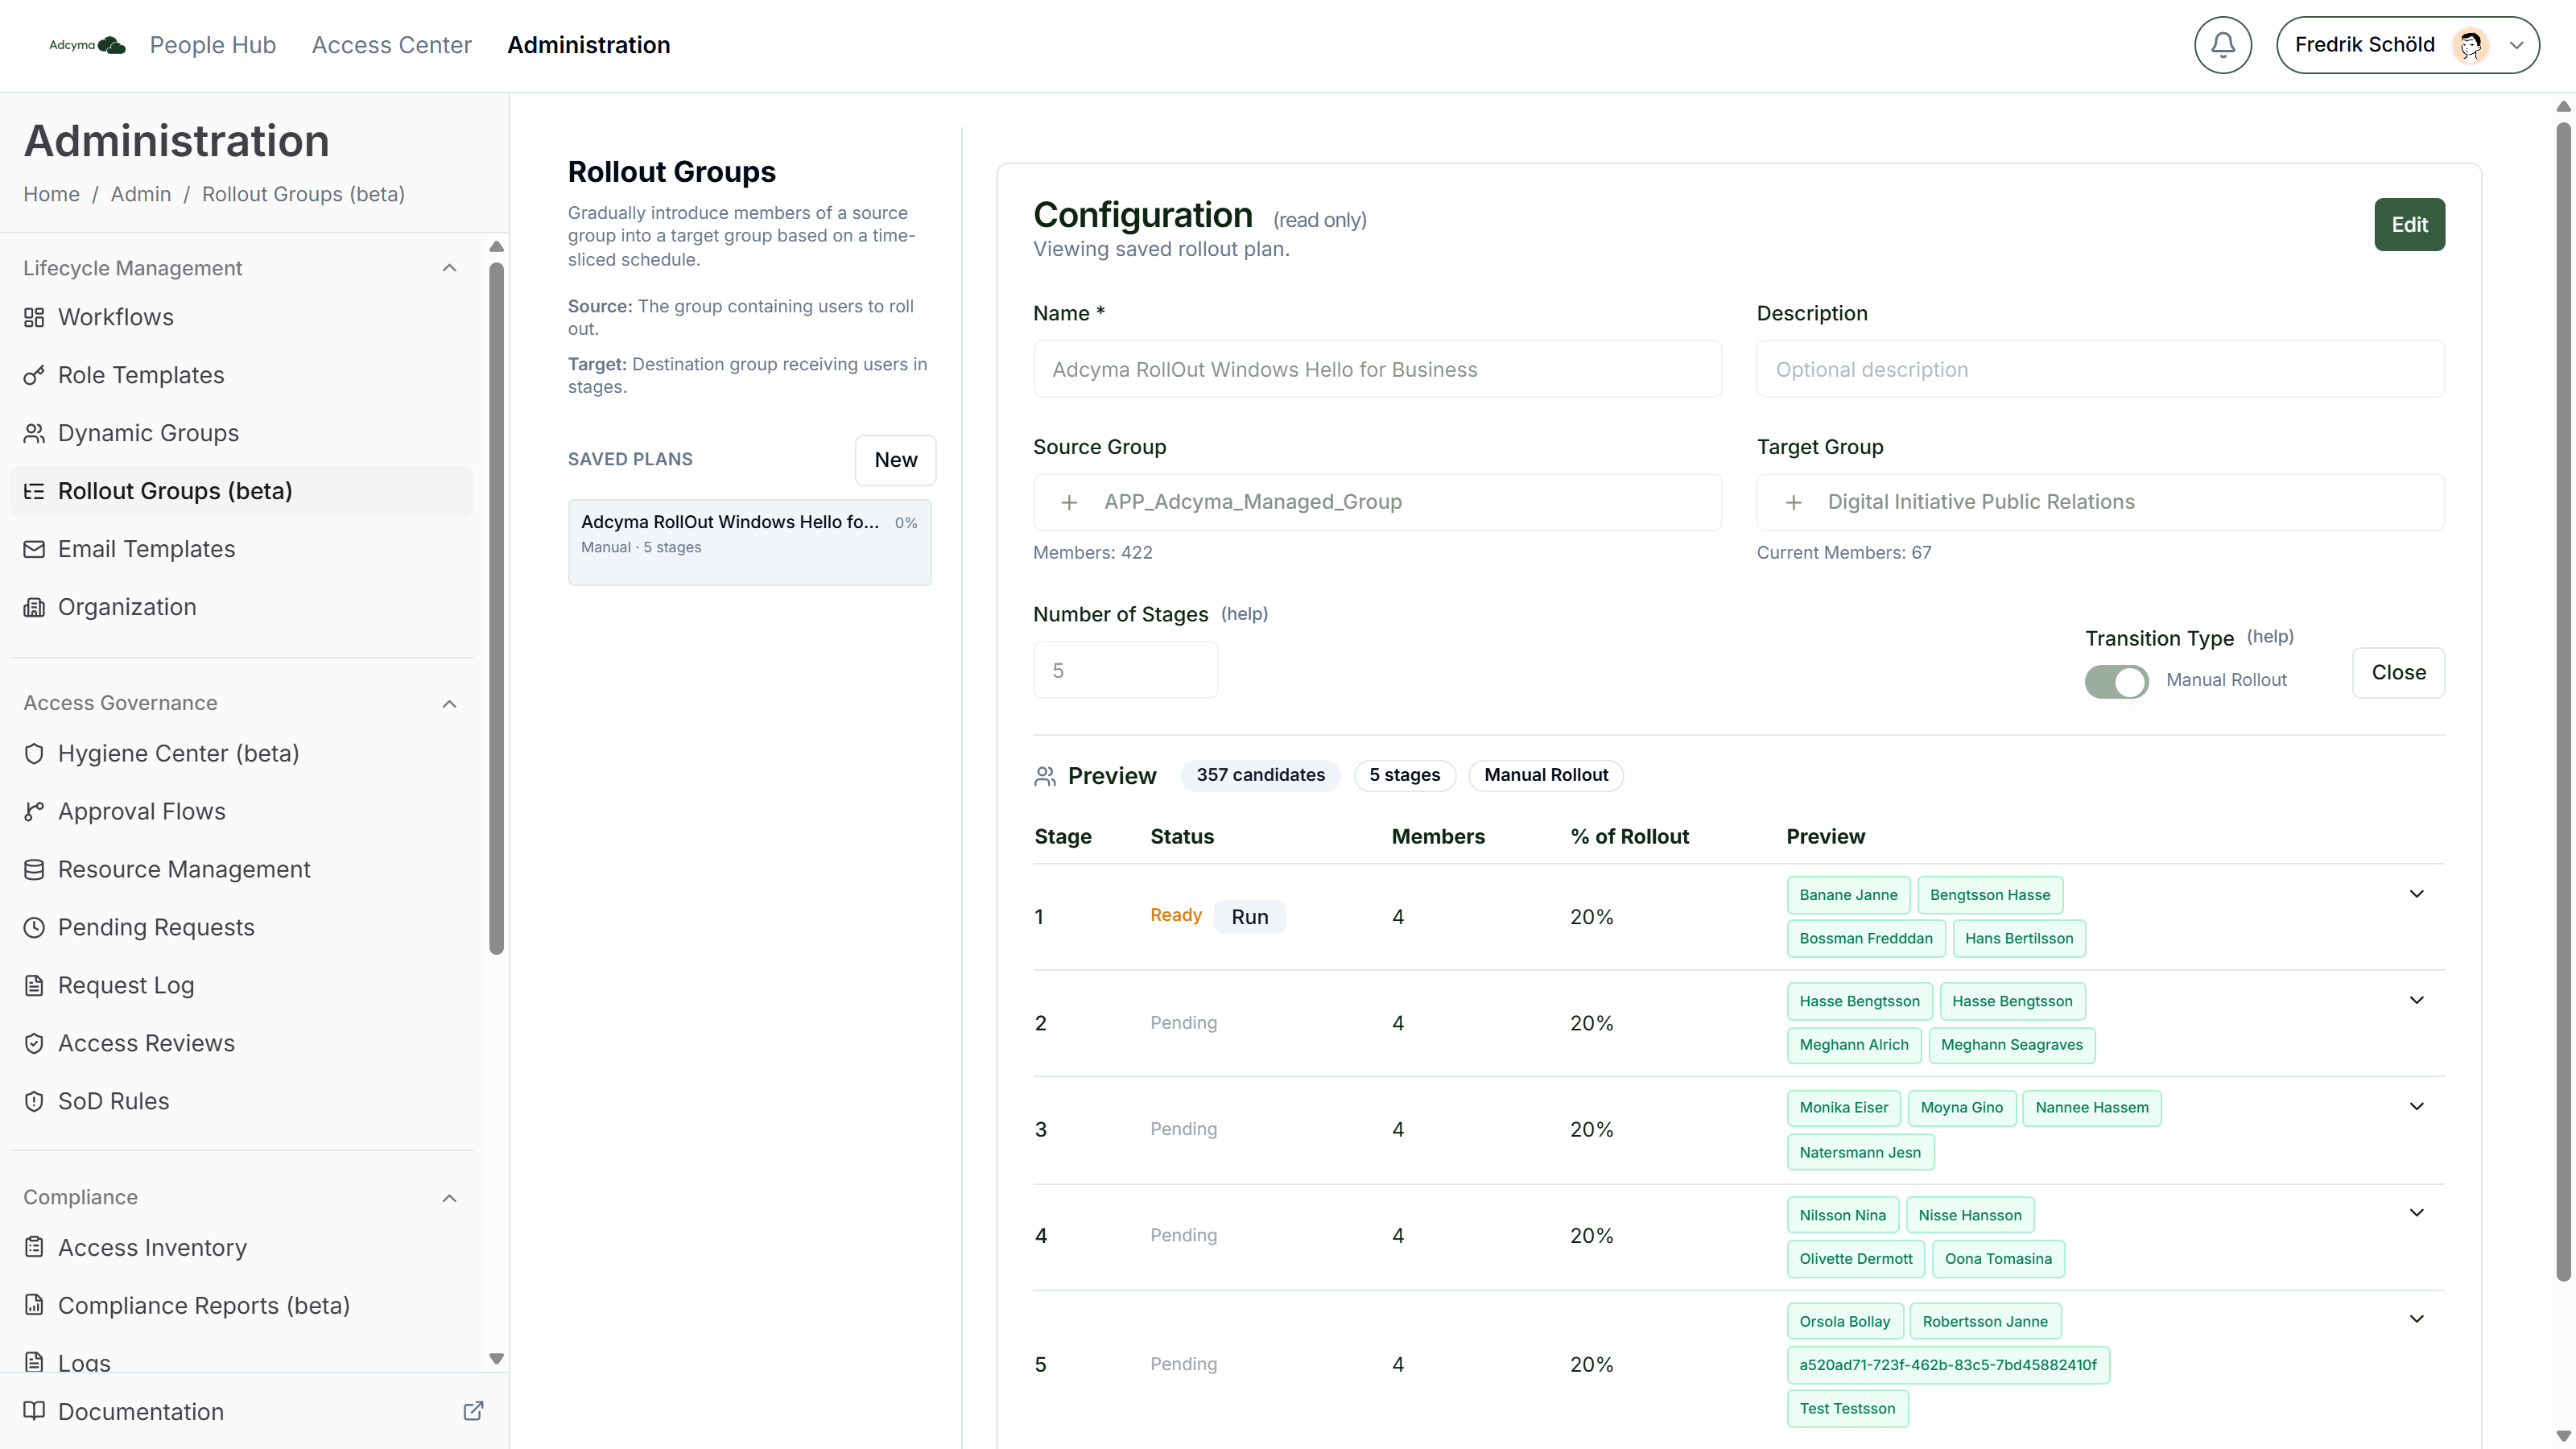
Before saving, the Preview table shows each stage with its start time (scheduled) or status (manual), how many members it will move, and its share of the rollout. Expand a stage to see exactly which users it contains. The badges at the top show the number of candidates, the number of stages and the transition type.
If every source member is already in the target group, the preview says there are no new members to roll out, and you can't save the plan.
<!-- TODO screenshot: /img/RolloutGroupsPreview.png | URL: https://portal.adcyma.com/administration/rollout_groups | click New, pick a source and target group, show the Preview table with stage start times and one stage expanded. Do NOT click Save; click Reset afterwards. -->
Running the Stages
Scheduled Rollout
Adcyma runs each stage automatically when its time comes. Stages always run in order, one at a time. If Adcyma falls behind, for example because the start time was in the past, overdue stages run as soon as possible, still in order.
If adding some users fails, for instance because of a temporary error from Microsoft Graph, Adcyma retries those users automatically before it marks the stage complete and moves on.
Pausing. Open the plan, click Edit, click Pause, then Save. Nothing more runs until you do the same with Resume. The Pause button only takes effect when you save. A stage that has already started finishes, and the users it added stay in the target group.
When you resume a rollout whose stage times have already passed, the overdue stages run right away, one after another. If you want the remaining stages spread out again, set a new Start At before you resume.
Manual Rollout
Nothing happens until you say so. Open the saved plan and the Preview table shows a status per stage:
| Status | Meaning |
|---|---|
| Ready | The next stage to run. A Run button sits next to it. |
| Pending | Waiting for earlier stages. |
| Completed | The stage has run and its users were added to the target group. |
Only the next stage in order can be run, so you can't skip ahead. Clicking Run adds that stage's users to the target group straight away and marks the stage Completed. In manual mode there's nothing to pause, because no stage runs on its own.
Manual mode is the right choice for the first rollout of a new kind, or anything where you want to check with users between batches.
Monitoring Progress
Saved plans appear in the list on the left. Each one shows:
- the name and, if set, the start of the description
- the mode: Manual, Scheduled or Scheduled (Paused), and the number of stages
- for scheduled plans, the time window from the first to the last stage
- a progress bar and percentage, based on how many stages have run
Click a plan to open it read-only, then Edit to change it.
Changing the number of stages on a saved plan regroups the remaining candidates (source members not yet in the target) into new stages. Keep edits to a running rollout to pausing and resuming. If the plan itself needs to change, create a new one.
Best Practices
- Start with a small number of stages to validate that the migration works as expected before going broad.
- Allow enough time between stages to gather feedback from users and verify that access is working correctly.
- Use manual mode for the first rollout of a new type, then switch to scheduled mode once you're confident in the process.
- Communicate the rollout schedule to affected users so they know when to expect changes.
- Keep the source group intact until the rollout is fully complete and verified. This makes it easier to roll back if needed.
Troubleshooting
If users aren't moving between stages:
- Check whether the plan shows Scheduled (Paused)
- For manual plans, check that someone clicked Run on the next stage
- Confirm the target group exists and Adcyma has permissions to modify its membership
- For AD-mastered target groups, check that the AD agent is online. Changes wait for the agent.
If a stage completes with fewer users than expected:
- Some users may have been added to the target group outside Adcyma before the stage ran
- Check for membership changes that occurred outside of Adcyma
If new source members aren't included:
- Stage lists are fixed when the plan is saved. Create a new rollout for people who joined the source group later.
If you need to stop a rollout:
- Pause the rollout (scheduled mode), or simply stop clicking Run (manual mode)
- Users already moved to the target group will stay there. You'll need to move them back manually if needed.